Some weeks are quieter than others. Nothing new and exciting over the past week. The most exciting thing to happen? Cosplayer friends who went to Supercon contacting me with questions about how to modify part of their outfit or prop, or how to fix a break that happened either during transport or at the con itself.
One of the biggest pieces of advice I can offer: Avoid hot glue. It's cheap and easy, but it will not hold effectively on something that is meant to be mobile. It's good for arts and crafts, but as far as parts of an outfit go or props? Not so much. Anything over an ounce or two will likely put more strain on the hot glue than it can handle once you add momentum/acceleration/deceleration to the mix. Otherwise known as starting and stopping motion. It will hold something in place that is stationary, but the shear forces will weaken its grip pretty quickly. Back to the main topic, the joys of making/repairing costumes or outfits generally boils down to a few questions: What tools do I have at my disposal? How long does the repair need to last? Am I aiming for form or function? How much time do I have to make the repair? My cosplay repair kit almost always has a variety of high-strength cyanoacrylate (aka CA, the older, beefier brother to superglue), gaff tape, double-sided gaff tape, leather punch/stitch kit, zip ties, a power drill/driver, and some stainless steel screws with good grip in various sizes. Those tools/consumables will be able to get just about anything repaired as far as props go that you may need, and they can fit in a relatively small tool box. For fabric repairs, it's always good to have an older model sewing machine around. They can go through light leather, medium weight vinyl, sheer fabric and normal fabric. Wonderful tools, and are almost always easier to fix a fabric/textile part of an outfit with a machine than by hand, especially in a time crunch. I always say to keep a leather punch/stitch kit, just because sometimes you're going to have to go through something rather heavy duty, likely in an awkward place, and more than likely made of thick foam or leather. Almost everything will need something different, but this is a short list of quick fixes: Broken prop - CA glue with a smidge of gaff to keep it in place until the CA sets. If it's something that you can repair from the "inside" use a little CA, and a stainless steel screw from the inside out. Broken armor - Double-sided gaff, maybe some leather stitches or zip ties Broken shoe - CA and gaff, make sure they let it set while the shoe is on their feet. Fabric costume mishap - Stitch it back together, or find someone who can. It might not be an extensive list, but it's what 4/5 of repairs to costumes usually boils down to. If you ever have questions, shoot me an email or some method of text-based communication. Have a wonderful week! Playmakers and their awesome shops This week I made a trip out to UNC in Chapel Hill, NC to do an overhaul on the costume shop's machines and make sure everything was working as it should. They have a mix of home machines that the undergrads tend to use and industrial machines that the grad students tend to use. I'll let you guess which ones are better cared for.
The people in charge were not there, so I was unable to get permission to take pictures of their setup. However, I did see a tour going through, and they might be able to schedule those? I was a little busy enjoying working on the machinery to pay too much attention to my surroundings. If you want more information about the awesome things they work on, and the schedule for their future shows, check out their website: PlayMakers Reperatory Company. I love working with theatres and educational facilities. It's always a wonder when I get to work with both at the same time. UNC and NCSU have me do work around their shops a few times a year just to make sure everything is running smoothly. Working with both universities is a privileged and I always love the people I work with. You can schedule basic training during service calls Fair warning, there likely won't be any fun pictures with this one. Sorry :(
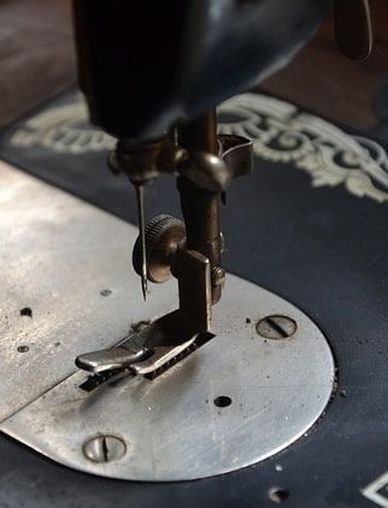
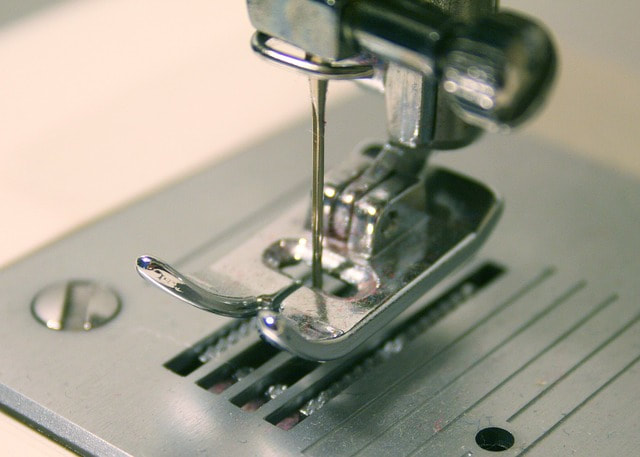
You can find this information by digging around on the site, but I figured it might be a good idea to post a little blurb with the same information: you can request some basic training and explanations during a service call. If you're working with tough materials on a regular basis and those are causing needles to break or timing to go just slightly off, I can walk you through the process of checking what can be done by a beginner to see what might be causing the issue. Having a background in machinery repair isn't necessary to do basic fiddling on most sewing machines. You can check the state of your equipment just by looking, feeling, or listening to what's going on with your machine. Some of the most common issues with light duty industrial or home machines are that you might have put some material through that the machine wasn't rated for, or only handles gingerly. Sewing over sequins or beads, leather, vinyl, denim, etc. can overtax a lot of lighter duty machines, and it will usually show by the needle bending and hitting the needle plate. This could cause the middle portion of the needle plate to bend and get barbs that catch thread and throw off the lower thread's ability to be caught, or might cut the upper thread during sewing. This is a quick diagnosis, but pretty easy to repair. You should almost always have a spare needle plate for those just-in-case moments if you're a professional/regular stitcher. This is one of many possible issues that could arise, and generally one of the most visibly obvious ones. The on-site training I offer is $50 for roughly 30-45 minutes where you can ask questions or have me show you how to work on your machine in-shop or at home. I can also walk you through the steps I follow when adjusting the machine for any work it needs. RESURRECTING antique machines. Sometimes I am asked to help restore old, old, old pieces of machinery. This weekend I finished up restoring an early 1940's antique Brunswick machine where the oldest patent listed on it was 1941. I was only asked to make it look shiny and decorative, but later I found out why; the wires from the motor to the power "box" were entirely bare. All the sheathing that was on them had long-since dry-rotted and been covered in rust. That's a fire hazard, one hell of a fire hazard. Below is a layout of all the parts that were "external" on the machine. Aka pretty much anything that would touch the outside, or kept something in place that touched the outside. With older machines, there's quite a few pieces, but significantly less than with newer all-metal machines. Almost every standard steel portion of the machine had rust, including some that were chromed and that it was leaking through in small spots. 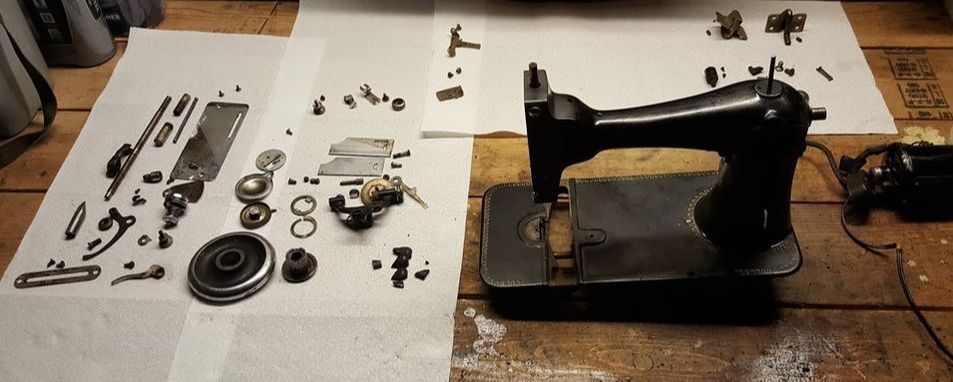 I've used quite a variety of parts cleaners over the years. Ranging from ultrasonic baths to bench grinders with wire wheels and just about every kind of chemical cleaning agent you can name. I've found that a diluted version of grill cleaners, stainless steel polish, and something like WD-40 will do wonders. I've found my own mix of them, but it's taken me close to 5 years to figure it out. If you want to do some testing, best of luck! (It's not difficult, I just appreciate the ability for people to learn for themselves with a little nudge in the right direction.) Below is the end product of what came out. It came in colored with as much rust and grime as there was black enamel on it, and left like this. Not too shabby for about 6 hours of work and another 3 hours of soaking. I still had to give a thorough warning to the owners not to plug it in or turn it on, and they said they weren't planning to, it was only a decorative piece, so let's hope they keep it that way. Yay! 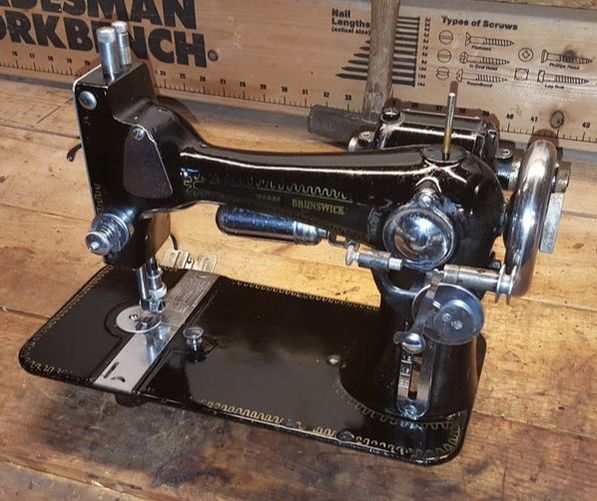 caution - Chemicals are bad, m'kay! i've been using these cleaning agents for quite some time and know their ins and outs. Wear a face mask, safety glasses, and keep pets away from the area in which you are working. skin contact is tolerable if you immediately wash it throroughly.Industrial feet, feed, and needle plateAside from tension issues, one of the most often found problems with industrial sewing machines is keeping an eye on your feet (walking or otherwise), your feed dog(s), and your needle plate.
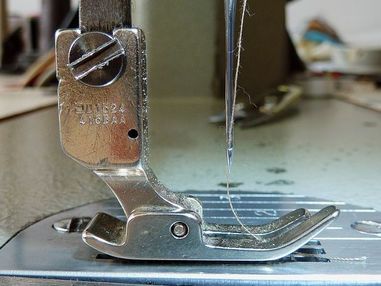
NEEDLE PLATE- Here's one of the places that some "unexplained" issues can be resolved. If you're sewing a good thickness of fabric, or a dense fabric, or even stretchy fabric, it is possible for your needle to move out of alignment during sewing and manage to hit the needle plate. A full on needle point hit will almost always break the needle, but if it just glances off, it will only leave a mar in the needle hole on the plate. This can catch on the upper and lower threads, and often effect how your stitch looks, or either of the threads could fray out and tear randomly.
|
Your sewing machine guy:I am a Jack-of-Most-Trades that was roped into working on sewing machines, and managed to find a knack for it. I love hilarity, fixing things that are broken, video games, dogs, cats, most other creatures, and sleep. Especially sleep. On here you'll usually find tidbits about recent visits or ADORABLE CREATURES THAT LOVE ON ME WHILE I WORK. There may be ancient machines, there may be unique machines. Archives
July 2020
Categories |
 RSS Feed